office (631) 273-2500
fax (631) 273-2557
toll-free (800) 645-2522
Tutorial : Adding Text and Formatting
Now that you've created a new script, and familiarized yourself with
the various elements that make up the script window, it's time to
type in some text.
Click in the editing area of the script window -- you'll notice that the vertical insertion bar will be blinking. Go ahead and start typing in some text -- and for reference's sake, try typing the following phrase:
"Teleprompting is not a job, it's an adventure!"
You should then have a script window that looks like this:

Now, we'll change the font of this text.
Click in the editing area of the script window -- you'll notice that the vertical insertion bar will be blinking. Go ahead and start typing in some text -- and for reference's sake, try typing the following phrase:
"Teleprompting is not a job, it's an adventure!"
You should then have a script window that looks like this:
Now, we'll change the font of this text.
Changing the Font
The font that's being displayed in the window above is "Arial", which is the
default when you first install Listec Pro News. We'll change it to a
serif font
such as "Times New Roman" so we can really see the difference. Show how to change the font
- Click on Text on the program menu.
- Click on Font...
- The Font Selection dialog appears:
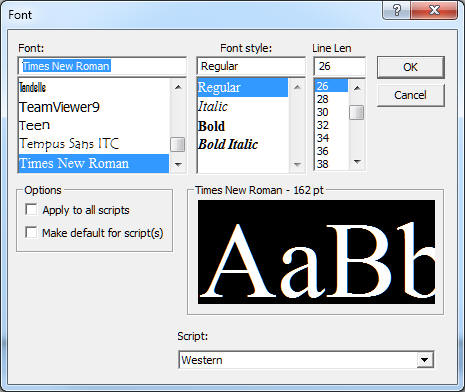
- In the Font column, select "Times New Roman" from the list.
Size is selected on a "characters per line" basis. In this case, it is estimated that an average of 26 characters could fit on each prompter line -- though it will be more or fewer based on content. Fonts are global to each scripts. - Note that you can also apply your font selection to ALL script in the runlist.
- The Script allows selections of fonts other than Western (Arabic, Greek, Cyrillic, etc.)
- The Preview box shows an example of the font selection, as well as the actual point size selection (Times New Roman - 162 point)
- Click OK.
The script will now look something like this:
Next, we'll examine a quicker way to adjust the line length to fit more characters on a line.
Next, we'll examine a quicker way to adjust the line length to fit more characters on a line.
Changing the Line Length
Instead of using traditional "point sizes" for fonts, Listec Pro News uses
the concept of Line Length (or CPL for Characters Per Line). This sets the number of characters that
appear on each line, so that line breaks are consistent regardless of the size of the window in which the script is displayed.
The CPL used in the example above is 26, which is the default. Let's change this to fit more text on each line -- to a higher number, such as 30.
The CPL used in the example above is 26, which is the default. Let's change this to fit more text on each line -- to a higher number, such as 30.
Show how to change the line length- Click on Text on the program menu.
- Click on Line Length.
- From the Line Length menu, select 30.
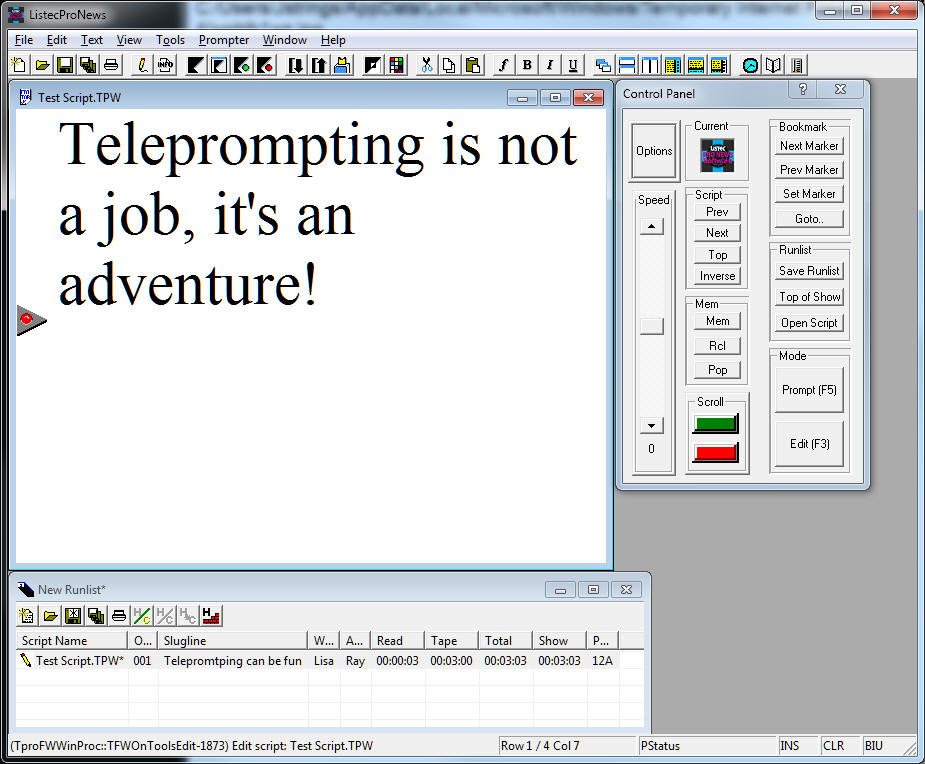
Now our script is looking like this:
![edit step 3]() src="images/edit_step3.jpg">
src="images/edit_step3.jpg">
Let's now select some text, then apply some Bold, Italic, and Underline formatting.
Let's now select some text, then apply some Bold, Italic, and Underline formatting.
Selecting Text and Applying Formatting
Before you can change the formatting of a specific word, it first must be
selected. Note that there are several ways to make selections in Windows;
this section covers how to make them with the mouse cursor. Once text is
selected, then you may apply various kinds of formatting, which only affects the
text which is selected.
Let's go through the script and apply some formatting: change "Teleprompting" to Bold text, "job" to Italics, and "adventure" to Underline. The examples below shows how to do the first word -- try it out, and then do the others on your own.
Let's go through the script and apply some formatting: change "Teleprompting" to Bold text, "job" to Italics, and "adventure" to Underline. The examples below shows how to do the first word -- try it out, and then do the others on your own.
Show how to select the word 'Teleprompting'-
Click and Drag
- Position the mouse cursor over the letter "T" in "Teleprompting".
- Click and hold down the left mouse button.
- Drag the mouse cursor until it's over the "g", then release the mouse button.
- The word "Teleprompting" should now be selected, and displayed with a colored highlight.
- or -
-
Double-Click
- Position the mouse cursor over any letter in "Teleprompting".
- Double-click the left mouse button.
- The word "Teleprompting" should now be selected, and displayed with a highlight.
Show how to apply Bold formatting- Click on Text on the program menu.
- Click on Attribute.
- From the Attribute menu, select Bold.
And now the script is taking shape, with some nicely formatted text:

Finally, let's change the colors of the text and background.
Finally, let's change the colors of the text and background.
Script Colors
Within the script, there are three different color areas that
you can assign colors: the text foreground color, the text background
color, and the window color:

Hopefully, nobody will ever want to prompt using the colors in the example above! But it does illustrate a few points about script colors:
Hopefully, nobody will ever want to prompt using the colors in the example above! But it does illustrate a few points about script colors:
Text Foreground Color - This is the color of the text itself,
which is set on a character-to-character basis. When you change the
text FG color, it only modifies the current selection.
Text Background Color - This is the color of the area behind
the text, similar to the area shown when you make a selection. Like the
FG color, changes to the BG color are only applied to the current selection.
Window Color - This is the entire editing area "behind" the text. As the example illustrates, the window color is separate from the text background, and is set for the entire script.
Inverse
A very handy command for manipulating the script colors is Inverse. This
command, generally speaking, swaps the text foreground color with the background and
window colors. It applies to a selection, if one's made, or inverses the entire
script, if no text is selected.
Use the Inverse command to change the example script to white text on a black background. Ensure there's no section set, so that the command will apply to the entire script.
 Show how to inverse all the script colors
The example script now has white text on a black background:

Use the Inverse command to change the example script to white text on a black background. Ensure there's no section set, so that the command will apply to the entire script.
Show how to inverse all the script colorsThe example script now has white text on a black background:
Setting the Text FG Color
Finally, let's set the text foreground color of a couple of words in the
script -- change "Teleprompting" to red, and "adventure" to blue. This is
accomplished by selecting the word, using the Text FG Color command,
and choosing a new color.
Show how to set the Text FG Color
The example script now has some nicely colored text:

Show how to set the Text FG Color
The example script now has some nicely colored text:
Next: Saving Scripts
